kidde nighthawk carbon monoxide alarm user guide

The Kidde Nighthawk Carbon Monoxide Alarm is a reliable safety device designed to detect CO levels in your home‚ ensuring early warning for protection. Its digital display provides clear readings‚ while battery operation offers continuous monitoring. This alarm is an essential tool for safeguarding your family from carbon monoxide risks.

1.1 Overview of the Device and Its Importance

The Kidde Nighthawk Carbon Monoxide Alarm is a vital home safety device designed to detect dangerous levels of carbon monoxide (CO) in the air. Its importance lies in providing early warnings to prevent CO poisoning‚ which can be deadly. The device is user-friendly‚ with a digital display showing CO concentrations and a loud alarm to signal danger. It operates on batteries‚ ensuring continuous protection even during power outages. As a key component of home safety systems‚ the Nighthawk CO Alarm is essential for safeguarding families and preventing potential tragedies caused by odorless‚ invisible CO gas.

1.2 Key Features of the Kidde Nighthawk CO Alarm

The Kidde Nighthawk CO Alarm boasts a digital display for real-time CO level monitoring‚ providing precise readings in parts per million. It features a tamper-resistant battery compartment and a hush button to silence nuisance alarms temporarily. The device is battery-powered‚ eliminating reliance on electricity‚ and includes a low-battery warning to ensure continuous protection. Its compact design allows easy installation in multiple locations‚ while the five-year limited warranty offers added peace of mind. These features make the Nighthawk a reliable and user-friendly choice for safeguarding against carbon monoxide threats in homes.

Installation Instructions

Install the Kidde Nighthawk CO Alarm on each level of your home‚ near bedrooms‚ and in living areas for comprehensive protection. Follow the user guide carefully.

2.1 Recommended Locations for Placement

For optimal protection‚ install the Kidde Nighthawk CO Alarm on every level of your home‚ inside or near bedrooms‚ and in living areas. Place one near sleeping areas to ensure early detection while occupants are resting. Additionally‚ install alarms in areas where fuel-burning appliances are present‚ such as near furnaces‚ water heaters‚ or fireplaces. Avoid locations near kitchens or garages‚ as cooking fumes or exhaust could trigger false alarms. Ensure alarms are at least 5 feet away from fuel-burning sources and not blocked by furniture or curtains. Proper placement ensures accurate detection and timely alerts for safety.

2.2 Step-by-Step Installation Process

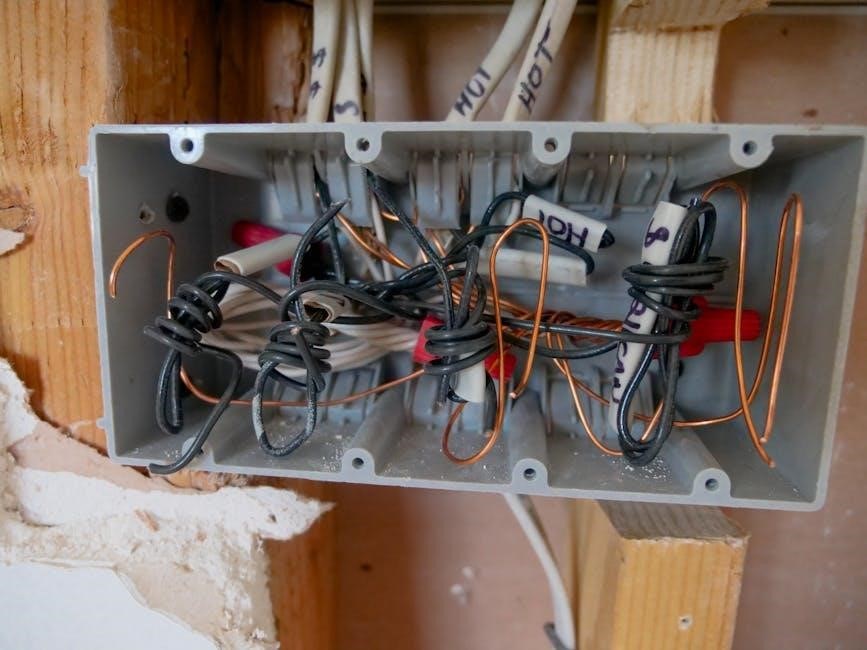
To install the Kidde Nighthawk CO Alarm‚ first‚ choose a location on each level of your home‚ ideally near bedrooms and living areas. Remove the alarm from its packaging and ensure batteries are correctly inserted. Mount the provided bracket to the wall using screws or adhesive strips‚ then attach the alarm to the bracket. For plug-in models‚ insert the device into a nearby outlet. Test the alarm by pressing the test button to ensure it functions properly. Finally‚ review the user guide for additional tips and maintenance instructions to ensure optimal performance and safety.

2.3 Where NOT to Install the Alarm

Avoid installing the Kidde Nighthawk CO Alarm in areas that may cause false readings or reduce its effectiveness. Do not place it in garages‚ near fuel-burning appliances like furnaces or water heaters‚ or in areas with high humidity‚ such as bathrooms or laundry rooms. Additionally‚ the alarm should not be installed near vents‚ windows‚ or doors‚ as drafts may interfere with its accuracy. It should also not be placed in direct sunlight or extreme temperatures; Avoid locations where it may be exposed to cooking fumes or chemicals‚ as this could lead to nuisance alarms. Proper placement ensures accurate detection and safety;

Understanding the Features and Operation

The Kidde Nighthawk CO Alarm features a digital display showing CO levels‚ battery operation for continuous monitoring‚ and a silence/reset button to address nuisance alarms easily.

3.1 Digital Display and Its Functions

The Kidde Nighthawk’s digital display provides real-time CO levels in parts per million (ppm)‚ ensuring users are informed about potential dangers. It also shows battery strength and error codes for easy troubleshooting. The display updates every 15 seconds‚ offering continuous monitoring. This feature helps users quickly assess situations‚ whether it’s a low-level CO leak or a more severe threat. The clear‚ backlit screen is easy to read‚ even in low-light conditions‚ making it a vital component for home safety and peace of mind.

3.2 Battery Operation and Replacement Guidelines

The Kidde Nighthawk operates on two AA batteries‚ providing continuous CO monitoring. Batteries should be replaced every six months or when the low-battery indicator sounds. Use high-quality alkaline batteries for optimal performance. Avoid mixing old and new batteries to prevent power issues. If the alarm chirps intermittently‚ it signals low battery levels. Replace batteries promptly to ensure uninterrupted protection. Properly dispose of used batteries according to local regulations. Regular battery checks are crucial for maintaining the alarm’s effectiveness and safeguarding your home from potential carbon monoxide threats.

3.4 Silence/Reset Function for Nuisance Alarms

The Kidde Nighthawk features a Silence/Reset function to temporarily quiet nuisance alarms caused by cooking or steam. Press and hold the test/reset button to silence the alarm. This function will not deactivate the alarm permanently and will resume monitoring CO levels. After silencing‚ the alarm will automatically reset and continue operation. Note that the Silence/Reset feature should only be used for non-emergency situations. If the alarm sounds repeatedly‚ check for potential CO sources before silencing. This function ensures the alarm remains functional while addressing false alarms‚ providing reliable protection against carbon monoxide threats.

Maintenance and Troubleshooting

Regularly clean the alarm with a soft brush and check battery levels. For troubleshooting‚ refer to the user guide for resolving common issues like false alarms or error signals.

4.1 Regular Maintenance Tips

Regular maintenance ensures your Kidde Nighthawk Carbon Monoxide Alarm functions optimally. Clean the sensor weekly with a soft brush to remove dust. Test the alarm monthly using the test/reset button. Replace batteries every six months or when the low-battery chirp sounds. Avoid exposing the alarm to extreme temperatures or humidity. Do not paint or damage the unit‚ as this can impair performance. Keep the alarm away from direct sunlight and chemical fumes. Refer to the user guide for detailed instructions. Proper upkeep ensures reliable detection and early warning of carbon monoxide threats‚ safeguarding your home and family.

4.2 Common Issues and Solutions

Common issues with the Kidde Nighthawk CO Alarm include false alarms‚ low battery signals‚ or sensor malfunctions. For false alarms‚ check for CO sources‚ clean the sensor‚ and ensure proper ventilation. If the low-battery chirp sounds‚ replace the batteries immediately. For sensor issues‚ clean it with a soft brush and ensure no blockages. If the alarm fails to test properly‚ reset it by pressing the test/reset button. Environmental factors like humidity or extreme temperatures can also affect performance. If problems persist‚ contact Kidde customer support or refer to the user guide for troubleshooting. Regular maintenance often resolves most issues.

4.3 How to Test the Alarm

To test the Kidde Nighthawk CO Alarm‚ press and hold the test/reset button until the alarm sounds. This ensures the sensor and speaker are functioning. The digital display may show CO levels or confirm the test. If the alarm does not sound‚ check for low batteries or obstructions. Clean the sensor if necessary. Regular testing ensures the alarm is ready to detect dangerous CO levels. If issues persist‚ refer to the user guide or contact customer support for assistance.

Safety Guidelines and Best Practices

Understand CO risks‚ ensure alarms are installed on every level‚ and educate family members on responding to alerts. Develop an emergency escape plan and practice regularly.

5.1 Understanding Carbon Monoxide Risks

Carbon monoxide (CO) is a colorless‚ odorless‚ and deadly gas produced by incomplete combustion from sources like heaters‚ vehicles‚ and fuel-powered appliances. Prolonged exposure can cause headaches‚ dizziness‚ nausea‚ and even death. CO alarms like the Kidde Nighthawk are critical for early detection‚ as CO cannot be detected by sight‚ smell‚ or taste. Understanding these risks emphasizes the importance of proper installation‚ maintenance‚ and having alarms on every level of your home‚ especially near sleeping areas‚ to protect your family from potential CO poisoning incidents.

5.2 Teaching Children to Respond to the Alarm

Teach children to recognize the Kidde Nighthawk’s alarm sound and understand its urgency. Explain that it signals potential danger from carbon monoxide. Instruct them to stay calm‚ exit the house immediately‚ and gather at a designated safe meeting spot outside. Ensure they know not to hide or return for belongings. Demonstrate how to call 911 or alert an adult if the alarm sounds. Regular drills can help children memorize these steps. Make sure they understand the importance of never ignoring the alarm‚ as prompt action is crucial for safety in a CO emergency.

5.3 Emergency Procedures When the Alarm Sounds

When the Kidde Nighthawk alarm sounds‚ act immediately. Evacuate the premises quickly and do not return for belongings. Once outside‚ stay at a safe distance and call emergency services‚ such as 911. Open windows for ventilation but avoid re-entering the home until authorities confirm it is safe. Do not use appliances or ignite flames‚ as this could worsen the situation. Check for anyone needing assistance‚ like the elderly or children‚ and ensure everyone is accounted for. Follow all instructions from emergency responders and only return inside after they give the all-clear.

Warranty and Support Information

The Kidde Nighthawk has a five-year warranty covering defects. Contact support at 1-800-880-6788 or visit their website for manuals and troubleshooting.

6.1 Warranty Details for the Kidde Nighthawk

The Kidde Nighthawk Carbon Monoxide Alarm comes with a five-year limited warranty covering manufacturing defects. This warranty ensures that any faulty units are repaired or replaced free of charge. The warranty period begins from the date of purchase‚ as indicated on the sales receipt. To make a warranty claim‚ customers must contact Kidde’s customer support team with proof of purchase. The warranty does not cover damage caused by improper installation‚ misuse‚ or tampering. It’s essential to register the product and follow all maintenance guidelines to maintain warranty validity.

6.2 Contacting Customer Support

For assistance with the Kidde Nighthawk Carbon Monoxide Alarm‚ customers can contact Kidde’s Consumer Hotline at 1-800-880-6788. This service is available to address any questions or concerns regarding the product. Additionally‚ Kidde’s official website provides a dedicated support page with resources such as troubleshooting guides‚ product manuals‚ and expert assistance. Users can visit the support page for help with smoke and carbon monoxide alarms. Whether you need installation guidance‚ warranty information‚ or repair assistance‚ Kidde’s customer support team is equipped to provide reliable solutions. Ensure to have your product model and purchase details ready for efficient service.

6.3 Accessing the User Guide and Additional Resources

To access the Kidde Nighthawk Carbon Monoxide Alarm user guide and additional resources‚ visit the official Kidde website or the product page. The user guide is available for download in PDF format‚ providing detailed installation‚ operation‚ and maintenance instructions. Additional resources include product data sheets and video tutorials for installation and troubleshooting. Kidde also offers a dedicated support page with downloadable manuals and troubleshooting guides. For further assistance‚ the user guide can be accessed directly through the product’s webpage or by clicking the download icon provided. These resources ensure comprehensive support for optimal use of the Kidde Nighthawk CO alarm.

3rd grade staar reading practice pdf answer key

Introducing 3rd Grade STAAR Reading Practice, essential for mastering reading skills. Utilize PDF resources and answer keys to enhance readiness and build confidence for the test.

Overview of the STAAR Test

The STAAR (State of Texas Assessments of Academic Readiness) test is a standardized assessment designed to measure student performance in reading, writing, mathematics, science, and social studies. For 3rd grade reading, the test evaluates students’ ability to comprehend and interpret fiction and nonfiction passages, as well as demonstrate critical thinking and vocabulary skills. The test consists of multiple-choice questions and is administered annually to assess readiness for grade-level expectations. While the test can be challenging, it provides valuable feedback for teachers, parents, and students to identify strengths and areas needing improvement. Understanding the test’s structure and content is crucial for effective preparation and confident performance.

Importance of Practice for STAAR Reading

Consistent practice is vital for success on the STAAR Reading test. Regular engagement with 3rd Grade STAAR Reading Practice PDFs helps students familiarize themselves with the test format, question types, and content. Practice builds fluency and accuracy in reading comprehension, ensuring students can confidently tackle both fiction and nonfiction passages. Additionally, practice tests provide opportunities to apply problem-solving strategies and time management skills. By using answer keys to review mistakes, students can identify and improve upon weak areas. This targeted preparation not only enhances academic performance but also boosts confidence, which is essential for achieving their full potential on test day.

Structure of the 3rd Grade STAAR Reading Test

The test features multiple-choice questions and various reading passages, including fiction and nonfiction. An answer key is provided to assess comprehension, critical thinking, and vocabulary skills effectively.

Fiction and Nonfiction Passages

The STAAR Reading Test includes a mix of fiction and nonfiction passages. Fiction passages may include short stories or excerpts, while nonfiction passages cover informational topics. These selections are designed to assess a student’s ability to comprehend and analyze different text types. The passages vary in length and complexity, ensuring a comprehensive evaluation of reading skills. Practice materials, such as PDFs, often mirror the test format, providing students with realistic examples. The answer key helps identify correct responses, allowing students to review and improve their understanding of both literary and informational texts effectively.

Types of Questions and Formats

The STAAR Reading Test features multiple question types to evaluate comprehension. These include multiple-choice questions, where students select the best answer, and short-answer questions, requiring concise written responses. The test also incorporates paired passages, where two texts are compared. Practice materials, such as PDFs, replicate these formats, helping students familiarize themselves with the test structure. The answer key provides correct responses and explanations, enabling students to review their work and improve. By practicing with these question types, students can enhance their critical thinking and test-taking skills, ensuring they are well-prepared for the actual STAAR Reading Test.

How to Use STAAR Reading Practice PDFs

Use STAAR Reading Practice PDFs to simulate test conditions. Complete passages and questions, then review with the answer key to track progress and improve skills effectively.

Locating Reliable Practice Materials

Finding reliable 3rd Grade STAAR Reading Practice materials is crucial for effective preparation. Official sources like the Texas Education Agency (TEA) website offer authentic practice tests and resources. Additionally, educational publishers and trusted websites provide STAAR-specific PDFs designed to mirror the actual test format. These materials often include answer keys and explanations, helping students and educators track progress. Ensure the resources align with the Texas Essential Knowledge and Skills (TEKS) for reading. Many schools and libraries also distribute approved practice materials. Always verify the source to guarantee accuracy and relevance. Using these tools will help students build confidence and familiarity with the test structure.

Effective Strategies for Using Practice Tests

Using 3rd Grade STAAR Reading Practice Tests effectively involves several key strategies. Begin with timed practice to simulate test conditions, helping students manage their time wisely. After completing a practice test, review the answer key to identify correct and incorrect answers. Focus on understanding mistakes by analyzing the reasoning behind each correct answer. Encourage students to apply reading strategies such as highlighting key details and making connections to prior knowledge. Regularly review challenging question types and themes to build familiarity. Track progress over time to identify improvement areas. By consistently applying these strategies, students can enhance their skills, boost confidence, and achieve better results on the actual STAAR test.

Understanding the Answer Key

The answer key provides correct responses, scoring guidelines, and explanations for each question. It helps identify strengths, areas for improvement, and aligns with TEKS for accurate assessment.

Interpreting Correct Answers and Scoring

The answer key provides detailed scoring guidelines, ensuring accurate assessment of student performance. Each correct answer is categorized under specific TEKS, such as Reading to Understand Literary and Informational Text. The key breaks down responses by readiness standards, supporting content expectations, and item numbers, offering clarity on how each question aligns with learning objectives. By referencing the answer key, educators and students can identify correct responses, understand scoring criteria, and track progress effectively. This alignment with TEKS ensures that assessments are both valid and reliable, guiding targeted instruction and improvement strategies.

Identifying Areas for Improvement

Using the answer key, students and educators can pinpoint strengths and weaknesses. Incorrect answers are analyzed to determine common mistakes, aligning with specific TEKS. This helps identify areas needing review, such as making inferences or understanding themes. By focusing on these gaps, targeted practice can be implemented. The answer key also highlights readiness standards and supporting content expectations, ensuring a clear understanding of where improvement is needed. Regular review of these areas helps students build skills and confidence for the STAAR test.

Common Challenges in STAAR Reading Practice

Students often struggle with difficult passages and complex vocabulary. Challenging question types and tricky themes can hinder comprehension, leading to incorrect answers. The answer key helps clarify these issues.

Difficult Question Types and Passage Themes

Students often find inferential questions and multi-step reasoning challenging. Complex passages, such as historical fiction or technical texts, can be tough to comprehend. The answer key highlights these areas, showing where errors occur and offering insights for improvement. Ensure to focus on practicing these question types to build confidence and accuracy. Use the PDF resources to familiarize yourself with tricky themes and question formats. Regular practice helps in mastering these difficult sections effectively.

Time Management During Practice

Effective time management is crucial during STAAR Reading practice. Allocate specific durations for each passage and question type to simulate real test conditions. Use PDF practice tests to get accustomed to the time constraints, ensuring students can complete all sections without rushing. Focus on pacing, especially for difficult passages and multi-step questions. The answer key helps identify areas where time is often wasted, allowing for targeted improvement. Regular timed practice builds stamina and reduces anxiety, ensuring students perform their best on test day. Develop a consistent routine to enhance efficiency and confidence.

ram raksha stotra pdf

Ram Raksha Stotra, authored by Sri Budha Kousika Rishi, is a revered hymn offering divine protection. It comprises 38 potent stanzas, each believed to ward off negativity and adversity, fostering spiritual and emotional well-being. Its widespread popularity endears it to devotees seeking solace and strength in challenging times, making it a cornerstone of devotion and faith.

1.1 Overview of Ram Raksha Stotra

Ram Raksha Stotra is a powerful prayer dedicated to Lord Rama, consisting of 38 verses. Authored by Sri Budha Kousika Rishi, it is a divine protective chant that shields devotees from adversity. Each stanza is believed to possess spiritual potency, offering solace and strength. Its popularity endures as a revered hymn, widely recited for its profound emotional and spiritual benefits, making it a timeless gem in Hindu devotion.

1.2 Significance and Popularity

Ram Raksha Stotra holds immense significance as a spiritual shield, offering protection and solace during challenging times. Its popularity stems from its profound emotional and protective benefits, resonating deeply with devotees. Often recommended by gurus, it is widely recited for its ability to provide comfort and strength. Its availability in PDF formats across multiple languages further enhances its accessibility and enduring appeal among followers worldwide.

Origin and Authorship

Sri Budha Kousika Rishi, a revered sage, is credited with composing the Ram Raksha Stotra. This sacred hymn was created to invoke Lord Rama’s divine protection, embodying deep spiritual significance and timeless wisdom in its 38 stanzas.

2.1 Sri Budha Kousika Rishi

Sri Budha Kousika Rishi, a revered sage, is the author of the Ram Raksha Stotra. Known for his spiritual wisdom, he crafted this hymn to invoke Lord Rama’s protection. The Stotra, with its 38 stanzas, reflects his deep devotion and is celebrated for its ability to ward off negativity and adversity, making it a cherished prayer among devotees seeking divine grace and solace in challenging times.

2.2 Historical Background

Ram Raksha Stotra traces its origins to ancient India, authored by Sri Budha Kousika Rishi. This sacred hymn, rooted in Vedic tradition, is believed to have been revealed to the sage in a divine vision. Composed in the Anushtup meter, it has been a cornerstone of Hindu devotion for centuries, offering protection and solace to those who recite it with faith and sincerity, enduring through generations as a powerful spiritual tool.

Structure and Composition

Ram Raksha Stotra consists of 38 stanzas, each crafted in Anushtup meter, glorifying Lord Rama. Its verses intricately weave devotion, protection, and divine grace, embodying timeless spiritual essence.

3.1 Number of Stanzas and Verses

Ram Raksha Stotra is structured into 38 stanzas, each containing four verses. This composition, written in the Anushtup meter, is believed to hold immense spiritual power, offering protection and divine grace to its reciters. The stanzas are meticulously arranged to invoke Lord Rama’s blessings, making it a comprehensive and potent devotional hymn.

3.2 Key Themes and Deities

Ram Raksha Stotra revolves around the worship of Lord Rama, emphasizing his divine attributes and protective grace. It describes Rama as dark-complexioned with lotus eyes, accompanied by Sita and Lakshmana. The hymn also invokes Hanuman and other deities like Ganesh and Durga, highlighting themes of devotion, divine protection, and spiritual growth. Each verse glorifies Rama’s benevolence, reinforcing faith and surrender to his divine will.

Benefits of Reciting Ram Raksha Stotra

Reciting Ram Raksha Stotra offers profound spiritual and emotional benefits, including divine protection, peace of mind, and strength during adversity. It is believed to neutralize negative energies and foster inner harmony, providing solace and courage to face life’s challenges.

4.1 Spiritual and Emotional Benefits

Reciting Ram Raksha Stotra offers divine protection, fostering spiritual growth and emotional resilience. It provides inner peace, solace, and strength during challenging times. The stotra is believed to neutralize negative energies, promoting harmony and courage. Devotees often experience a deep sense of calm and spiritual upliftment, helping them navigate life’s difficulties with faith and confidence.

4.2 Practical Benefits and Protection

Reciting Ram Raksha Stotra offers practical protection from adversities, negative energies, and unforeseen challenges. It is believed to safeguard individuals from diseases, misfortunes, and evil intentions. The stotra also provides protection in legal matters, relationships, and career, ensuring overall well-being. Regular recitation helps in resolving problems and attracts positive outcomes, making it a powerful tool for daily life’s practical challenges and spiritual security.

How to Recite Ram Raksha Stotra

Wake up early at 4 AM, considered the best time for recitation. Use a comfortable asana or dhurrie. Focus on the mantra with devotion; Ideal for spiritual growth and protection.

5.1 Best Time for Recitation

The ideal time to recite Ram Raksha Stotra is during the Brahmamuhurta, between 4 AM and 6 AM. This period is considered sacred, offering heightened spiritual focus and mental clarity. Reciting during this time enhances the mantra’s effectiveness, fostering a deeper connection with Lord Rama and amplifying its protective benefits. Consistency in daily practice is key for optimal results.

5.2 Posture and Prerequisites

For effective recitation, sit comfortably on an asana or a clean seat, preferably facing east. Wear clean clothes and maintain personal hygiene. A pure environment enhances focus. Use a dhurrie if an asana isn’t available. Ensure mental concentration and a clean heart, as these are crucial for the mantra’s efficacy. Avoid distractions and maintain a calm, meditative state throughout the recitation.

Availability of Ram Raksha Stotra in PDF

Ram Raksha Stotra is readily available in PDF format online. Devotees can download it from various spiritual websites and religious portals in multiple languages, including English, Sanskrit, and Hindi.

6.1 Sources for Download

Ram Raksha Stotra in PDF is easily accessible online. Devotees can download it from spiritual websites, religious portals, and platforms like www.examplelinks.com. These sources offer the stotra in multiple languages, including English, Sanskrit, and Hindi, ensuring accessibility for a global audience. A simple search query yields numerous options, making it convenient for anyone to obtain the PDF version effortlessly.

6.2 Language Variations

Ram Raksha Stotra is available in multiple languages, including English, Sanskrit, and Hindi, catering to a diverse audience. The PDF versions often feature the original Sanskrit text alongside translations, preserving its spiritual essence. This linguistic diversity ensures that devotees worldwide can recite and connect with the stotra, regardless of their native language, making it a universally accessible spiritual resource.

Testimonials and Real-Life Experiences

Devotees share heartwarming experiences, recounting how Ram Raksha Stotra brought solace during hardships. Many testify to its calming effects and divine guidance, transforming their lives profoundly.

7.1 Personal Stories of Devotees

Devotees often share heartfelt anecdotes of how Ram Raksha Stotra transformed their lives. Many recount moments of despair alleviated by its recitation, feeling Lord Rama’s protective grace. A devotee recalled childhood memories of reciting the stotra, instilling deep faith. Others describe emotional healings and a sense of divine guidance, emphasizing its role in their spiritual journeys and daily lives.

7.2 Psychological and Spiritual Impact

Ram Raksha Stotra offers profound psychological and spiritual solace, acting as a protective shield in challenging times. Its recitation provides emotional healing, calming the mind and fostering inner peace. Devotees report a deep sense of connection to Lord Rama, experiencing spiritual growth and resilience. The stotra’s verses are believed to neutralize negativity, promoting positivity and mental clarity, making it a cherished practice for spiritual upliftment and personal transformation.

Cultural and Religious Significance

Ram Raksha Stotra holds immense cultural and religious importance, deeply rooted in Hindu traditions. It is often recited in rituals and ceremonies, symbolizing devotion to Lord Rama and seeking divine protection. Its verses resonate with spiritual values, making it a cherished part of religious practices and cultural heritage, reflecting faith and reverence in Hindu society.

8.1 Role in Hinduism

Ram Raksha Stotra plays a significant role in Hinduism, serving as a powerful devotional hymn dedicated to Lord Rama. It is widely recited by devotees to seek divine protection and blessings, embodying the essence of faith and devotion. The stotra’s verses extol Lord Rama’s virtues and are believed to offer spiritual solace and strength, making it an integral part of Hindu religious practices and rituals, fostering a deep connection with the divine.

8.2 Use in Rituals and Ceremonies

Ram Raksha Stotra is integral to various Hindu rituals and ceremonies, often recited during auspicious occasions and challenging times. Devotees chant it seeking protection, prosperity, and peace, believing its verses hold potent spiritual power. The stotra is also used in pujas, homas, and other sacred rituals, enhancing their efficacy and creating a divine ambiance, thus deepening the connection with Lord Rama and invoking His blessings for spiritual and material well-being.

Additional Tips for Effective Recitation

For effective recitation, seek a guru’s guidance, maintain a sattvik diet, and sit in a comfortable posture. Focus on pronunciation and devotion to enhance spiritual benefits and protection.

9.1 Importance of Sattvik Food

Adhering to a sattvik diet is crucial for effective recitation of Ram Raksha Stotra. Sattvik food ensures purity of mind and body, fostering a calm and focused state. It strengthens devotion and enhances the spiritual benefits of the stotra, allowing deeper connection with Lord Rama. A pure diet aligns with the stotra’s essence, promoting inner peace and clarity during chanting, essential for its protective and transformative effects.

9.2 Role of Guru’s Permission

Guru’s permission is essential for reciting Ram Raksha Stotra, ensuring authenticity and proper guidance. It signifies devotion and readiness, enhancing the stotra’s spiritual impact. Seeking a Guru’s blessings aligns intent with tradition, fostering a deeper connection with Lord Rama and amplifying the prayer’s protective grace and transformative power, making the recitation more effective and meaningful.

Ram Raksha Stotra is a powerful hymn offering divine protection and peace. With its 38 stanzas, it remains a timeless shield of faith, guiding devotees toward Lord Rama’s grace and strength. Embrace this sacred prayer to experience its transformative power in your life.

10.1 Final Thoughts

Ram Raksha Stotra, with its 38 transformative stanzas, stands as a divine shield of protection and peace. Its timeless relevance continues to inspire devotion, offering solace in adversity. Embrace this sacred hymn to experience its profound impact, fostering faith and resilience in your spiritual journey. Regular recitation can deepen your connection to Lord Rama, bringing harmony and strength to your life.

10.2 Encouragement for Regular Practice

Embrace the Ram Raksha Stotra as a lifelong spiritual companion. Regular recitation fosters deep devotion, offering protection and peace. Recite it with sincerity during Brahmamuhurta for optimal benefits. Adhere to sattvic practices and seek your guru’s guidance to enhance its efficacy. Consistency will deepen your connection to Lord Rama, providing strength and solace in life’s journey. Make it a daily ritual for lasting harmony and divine grace.

lasers and feelings pdf

Lasers and Feelings is a quick-play RPG by John Harper, inspired by The Doubleclicks․ Explore space, encounter aliens, and defend Consortium worlds in this free, lighthearted PDF adventure․

Overview of the Game

Lasers and Feelings is a space-themed RPG designed for quick, lighthearted play․ Players take on roles as the crew of the interstellar scout ship Raptor, exploring uncharted space, encountering aliens, and defending Consortium worlds․ The game emphasizes storytelling and creativity over complex rules, making it accessible to new players․ Its simple system allows for fast-paced, fun sessions, perfect for casual gaming․ Available as a free PDF, it’s an excellent choice for those seeking a relaxed, humorous sci-fi RPG experience without deep strategic planning․

Background and Inspiration

Lasers and Feelings was created by John Harper, known for his innovative RPG designs․ Inspired by the music of The Doubleclicks, this game blends humor and sci-fi elements, offering a lighthearted take on space exploration․ Its simplicity and accessibility make it a standout title, appealing to both newcomers and experienced players․ The game’s design reflects Harper’s signature style of balancing storytelling with easy-to-learn mechanics, ensuring a fun and engaging experience for all participants․ Its free PDF format has made it widely popular among tabletop enthusiasts seeking a casual, entertaining adventure․

Core Mechanics of the Game

The game revolves around choosing between Lasers (logic) or Feelings (emotions), with dice rolls determining success or failure based on preparedness and expertise, shaping the game’s dynamic․

The “Lasers vs․ Feelings” System

Lasers and Feelings introduces a unique binary system where players choose between Lasers (logic, technology) or Feelings (emotions, intuition)․ When using Lasers, players roll under their skill number, while Feelings require rolling over․ This mechanic simplifies decision-making, emphasizing character traits․ The system ensures dynamic outcomes, with successes, complications, or failures based on dice results․ It encourages storytelling and adaptability, making each scenario unpredictable and engaging for players․ This straightforward approach enhances the game’s accessibility and fun, appealing to both new and experienced RPG enthusiasts․

Rolling Mechanics and Dice Rules

In Lasers and Feelings, players use a simple d6 system․ When taking risks, roll 1d6․ Add 1d6 if prepared or an expert․ If helping others, describe your aid and roll․ Success or failure depends on whether you use Lasers (roll under) or Feelings (roll over)․ Multiple successes grant better outcomes, while none mean things go wrong․ This mechanic ensures dynamic, unpredictable scenarios, keeping the game engaging and accessible for all players․ The rules are designed to foster creativity and teamwork, making every roll meaningful and fun․

Character Creation and Roles

Create your character by selecting a role and motivation․ Assign Lasers and Feelings attributes based on expertise and personality․ This simple system ensures quick, engaging character setup for all players․

Role Selection and Motivation

In Lasers and Feelings, players choose distinct roles, such as Engineers, Diplomats, or Fighters, each with unique traits․ Motivation defines how characters interact, driving their actions and decisions․ Whether it’s logic, empathy, or bravery, these traits shape the story․ The game emphasizes collaboration, encouraging players to align their roles and motivations for cohesive teamwork․ This system ensures every character has a clear purpose, making gameplay dynamic and engaging while fostering creative problem-solving in space adventures․ Role selection and motivation are key to crafting a memorable interstellar experience․

Preparation and Expertise in Gameplay

In Lasers and Feelings, preparation and expertise significantly influence gameplay․ Players can gain bonuses by being prepared or having specialized skills, adding extra dice to their rolls․ This encourages strategic thinking and roleplay․ For example, an Engineer might use tools to fix a ship, while a Diplomat could calm hostile aliens․ Expertise enhances problem-solving, making characters more effective in their roles․ The game rewards creativity, ensuring that preparation and skill directly impact success, creating a balanced and engaging experience for all players․ This mechanic keeps gameplay dynamic and fun․

Mission Structure and Gameplay

Lasers and Feelings features dynamic missions where players explore uncharted space, encounter aliens, and defend against threats․ The game balances action, diplomacy, and problem-solving, creating engaging adventures․

Exploring Uncharted Space

Exploring uncharted space in Lasers and Feelings is a core aspect of gameplay․ Players venture into the unknown aboard the scout ship Raptor, discovering new worlds and encountering mysterious phenomena․ The game emphasizes preparation and expertise, allowing players to use their skills creatively․ Each journey is unique, with dynamic challenges and unexpected discoveries․ Whether scanning for resources or navigating cosmic dangers, exploration is a mix of excitement and strategy, blending sci-fi adventure with lighthearted fun․ The interstellar setting provides endless opportunities for imaginative storytelling and bold action․

Dealing with Alien Encounters

Alien encounters in Lasers and Feelings are dynamic and unpredictable․ Players must decide whether to use Lasers (logic and technology) or Feelings (empathy and diplomacy) to resolve interactions․ Rolling dice determines success, with modifiers for preparation and expertise․ Friendly aliens may offer alliances or trade, while hostile ones pose threats․ The GM introduces complications, such as misunderstandings or hidden agendas, keeping players on their toes․ Creative problem-solving and teamwork are essential to navigate these interstellar meetings, making each encounter unique and memorable․ Alien interactions are a blend of humor, danger, and opportunity․

The Setting of “Lasers and Feelings”

The game is set in a sci-fi universe where players crew the interstellar scout ship Raptor․ The Consortium worlds serve as the central hub for missions and exploration, blending space opera elements with humor and adventure․ Aliens, uncharted planets, and cosmic threats create a vibrant, dynamic setting for players to navigate․ The Raptor’s crew must balance defending Consortium interests with exploring the unknown, making the setting rich in possibilities and conflicts․

The Interstellar Scout Ship Raptor

The interstellar scout ship Raptor serves as the crew’s home and mobile base, equipped for exploration and defense․ Players aboard the Raptor embark on missions to explore uncharted space, encounter diverse alien species, and protect Consortium worlds from threats․ The ship’s design emphasizes versatility, allowing it to adapt to various scenarios, from diplomacy to combat․ Its role is central to the game’s setting, providing a dynamic environment for storytelling and adventure․ The Raptor symbolizes the crew’s independence and resourcefulness as they navigate the challenges of space․

The Consortium Worlds and Their Significance

The Consortium Worlds are a cluster of planets united under a shared governance, representing the last bastion of organized civilization․ These worlds are rich in resources and culture, serving as the backbone of humanity’s interstellar presence․ As the crew of the Raptor, players are tasked with protecting these worlds from external threats, ensuring their survival․ The Consortium’s diversity fosters a dynamic environment for diplomacy, trade, and conflict, making them central to the game’s narrative and missions․ Their significance lies in their role as both a sanctuary and a hub for adventure, driving the story forward․

PDF and Accessibility

The Lasers and Feelings PDF is freely available for download, licensed under CC BY-NC-SA 3․0․ This ensures easy access and sharing, making the game widely accessible to everyone․

Downloading the PDF Version

The Lasers and Feelings PDF is readily available for download on platforms like Board Game Geek and Itch․io․ The file is free to access and share, with a size of around 456 KB․ Licensed under CC BY-NC-SA 3․0, it allows for personal use and distribution, ensuring accessibility for all players․ Simply visit the official links, download the PDF, and start your interstellar adventures with the crew of the Raptor․ No registration or payment is required, making it easy to dive into the game immediately․

License and Distribution Details

Lasers and Feelings is released under a CC BY-NC-SA 3․0 license, allowing for free distribution and modification․ The PDF is available on platforms like Board Game Geek and Itch․io․ Players are encouraged to share the game, but commercial use requires permission․ This licensing ensures accessibility while respecting the creator’s rights․ Downloads are straightforward, with no registration required, making it easy for everyone to enjoy this space opera RPG․

Lasers and Feelings is a charming, free space opera RPG that combines humor and creativity․ Its accessibility and lighthearted design make it a must-try for tabletop enthusiasts of all levels․

Final Thoughts on the Game

Lasers and Feelings stands out as a refreshingly simple yet engaging RPG․ Its blend of humor, creativity, and straightforward mechanics makes it accessible to newcomers while offering depth for veterans․ The game’s lighthearted tone and focus on collaborative storytelling ensure memorable experiences․ With its free PDF availability and ease of play, it’s an excellent choice for quick sessions or introducing friends to tabletop gaming․ Give it a try and discover how effortlessly it balances lasers, feelings, and fun in a cosmic adventure!

Encouragement to Play and Share

Lasers and Feelings is a game meant to be shared and enjoyed with others․ Its simplicity and humor make it a perfect introduction to RPGs for new players․ Encourage friends to join you in exploring the cosmos, battling aliens, and solving problems with either logic or emotion․ Share your adventures online, post feedback, and spread the word about this delightful free PDF․ The more people who play, the more stories and laughter will fill the galaxy!

dungeons and dragons 1st edition pdf

Welcome to the iconic Advanced Dungeons & Dragons 1st Edition‚ a cornerstone of tabletop gaming. Authored by Gary Gygax‚ this 1977-1979 rewrite of the original rules offers a refined‚ canonical version of the game. Now available as officially licensed‚ watermarked PDFs‚ players and Dungeon Masters can explore classic content with modern convenience‚ preserving the legacy of this beloved edition for new and veteran enthusiasts alike.

Overview of the 1st Edition

Advanced Dungeons & Dragons 1st Edition (AD&D 1e) is a landmark version of the iconic tabletop RPG‚ authored by Gary Gygax between 1977 and 1979. It represents a refined and standardized form of the original 1974 Dungeons & Dragons rules‚ addressing inconsistencies and expanding gameplay mechanics. AD&D 1e introduced a more structured framework‚ separating player and Dungeon Master roles‚ and expanded character classes‚ spells‚ and monsters. Its core rulebooks—the Player’s Handbook‚ Dungeon Master’s Guide‚ and Monster Manual—are celebrated for their depth and creativity. The 1st Edition became a cultural phenomenon‚ inspiring countless adventures‚ supplements‚ and adaptations. Today‚ its PDFs are widely available‚ allowing modern players to experience the game’s foundational brilliance. AD&D 1e remains a beloved classic‚ cherished for its complexity and nostalgic charm‚ influencing both modern D&D and the Old School Renaissance movement.

Historical Background and Development

Advanced Dungeons & Dragons 1st Edition emerged from the original 1974 rules‚ refined by Gary Gygax between 1977 and 1979 to standardize gameplay and resolve inconsistencies‚ creating a foundational RPG legacy.

The Creation of Advanced Dungeons & Dragons (AD&D)

Advanced Dungeons & Dragons (AD&D) 1st Edition was authored by Gary Gygax between 1977 and 1979 as a comprehensive rewrite of the original 1974 Dungeons & Dragons rules. This edition aimed to standardize gameplay‚ resolve inconsistencies‚ and establish a canonical form of the game. Gygax’s vision was to create a more structured and detailed system‚ separating it from the earlier‚ simpler version of the game. The release of AD&D marked a significant evolution in tabletop gaming‚ offering a robust framework for both players and Dungeon Masters. Its creation not only solidified D&D’s place in gaming culture but also laid the groundwork for future editions. The 1st Edition became iconic‚ blending complexity with creativity‚ and remains a beloved version among retro gaming enthusiasts.

Core Rulebooks of the 1st Edition

The Player’s Handbook‚ Dungeon Master’s Guide‚ and Monster Manual comprise the core rulebooks of AD&D 1st Edition‚ providing essential rules for character creation‚ world-building‚ and monster encounters.

Player’s Handbook (PHB)

The Player’s Handbook (PHB) is a foundational rulebook for Advanced Dungeons & Dragons 1st Edition‚ offering comprehensive guidance for players. It details character creation‚ races‚ classes‚ spells‚ and equipment‚ providing the tools needed to craft unique adventurers. The PHB is renowned for its detailed rules and expansive options‚ allowing players to customize their characters extensively. First released in 1978‚ it became a cornerstone of the game‚ influencing countless later editions. Its legacy endures‚ with the PDF version now available‚ enabling modern players to experience the classic gameplay that shaped the RPG genre. The PHB remains indispensable for both new and veteran players‚ ensuring a deep and immersive D&D experience.

Dungeon Master’s Guide (DMG)

The Dungeon Master’s Guide (DMG) is an essential tool for Dungeon Masters in Advanced Dungeons & Dragons 1st Edition. Authored by Gary Gygax‚ it is a treasure trove of creative content‚ offering detailed guidance on world-building‚ non-player characters‚ magic items‚ and game mechanics. Despite its chaotic organization‚ the DMG is celebrated for its richness and depth‚ making it a must-have for any DM seeking to enhance their campaigns. Its influence on modern gaming is undeniable‚ and its legacy continues with the availability of a digital PDF version‚ allowing new generations of Dungeon Masters to explore its vast resources and bring their unique visions to life at the table.

Monster Manual (MM)

The Monster Manual (MM) is one of the core rulebooks of the Advanced Dungeons & Dragons 1st Edition. It serves as an encyclopedic guide to the vast array of creatures that inhabit the game’s world‚ providing detailed descriptions‚ game statistics‚ and background information for each monster. This essential resource allows Dungeon Masters to populate their campaigns with iconic and terrifying foes‚ from dragons to liches‚ each with unique abilities and characteristics. The MM is now available as a digital PDF‚ making it easily accessible for both new and veteran players. Its comprehensive nature ensures that it remains a vital tool for creating engaging and immersive encounters‚ reinforcing its importance in the legacy of AD&D 1st Edition.

Notable Adventures and Supplements

Iconic modules like the “A” series and supplements significantly expanded the game’s depth‚ offering new challenges and lore‚ enriching the 1st Edition experience for players and Dungeon Masters alike.

Iconic Modules and Their Significance

The 1st Edition of Advanced Dungeons & Dragons is renowned for its iconic adventure modules‚ which shaped the game’s identity and storytelling. Modules like the “A” series (A1-A4) and the Temple of Elemental Evil introduced complex narratives and detailed settings‚ setting a new standard for D&D adventures. These modules were groundbreaking‚ offering players immersive experiences that combined combat‚ exploration‚ and problem-solving. The Village of Hommlet‚ for example‚ provided a unique blend of role-playing and dungeon crawling‚ while the Slavers series delved into darker themes. These adventures‚ now available as PDFs‚ remain influential‚ inspiring modern campaigns and showcasing the creativity of legendary designers like Gary Gygax. Their release in digital format ensures that both veteran players and newcomers can explore these timeless tales‚ preserving their legacy for future generations.

Expansion of the Game World

The 1st Edition of Advanced Dungeons & Dragons significantly expanded the game world through its detailed settings and sourcebooks. The introduction of iconic locations like the World of Greyhawk and the Forgotten Realms enriched the lore‚ offering players and Dungeon Masters a vast canvas for storytelling. Sourcebooks such as the World of Greyhawk and the Forgotten Realms Boxed Set provided intricate details about geography‚ history‚ and notable figures‚ creating immersive environments for campaigns. These expansions not only enhanced gameplay but also laid the foundation for the game’s growth into a global phenomenon. The 1st Edition’s emphasis on world-building set a precedent for future editions‚ ensuring that the game’s lore and settings remain central to its appeal. This expansion of the game world continues to inspire both nostalgia and innovation in modern D&D.

Availability of 1st Edition PDFs

Officially licensed 1st Edition Advanced Dungeons & Dragons PDFs are now available through platforms like DriveThruRPG and DnDClassics.com. These watermarked‚ searchable files preserve the game’s legacy for new and veteran enthusiasts alike.

Digital Releases and Platforms

Wizards of the Coast has officially released the 1st Edition Advanced Dungeons & Dragons PDFs as part of their digital initiative. These classic titles are now available through platforms like DriveThruRPG and DnDClassics.com‚ offering fans easy access to core rulebooks‚ adventures‚ and supplements. The initial wave includes iconic books such as the Monster Manual and Fiend Folio‚ with plans to expand the catalog over time. Each PDF is watermarked and searchable‚ ensuring both convenience and fidelity to the original content. This digital release not only preserves the legacy of the game but also introduces it to a new generation of players. The move aligns with Wizards’ goal to make every Dungeons & Dragons resource available digitally‚ while also providing conversion rules for integration with 5th Edition play.

Influence of 1st Edition on Popular Culture

The 1st Edition surged in popularity‚ sparked by a Saturday morning cartoon and endless controversies‚ propelling Dungeons & Dragons into mainstream culture and shaping its lasting influence.

From Cartoons to Controversies

The 1st Edition of Dungeons & Dragons became a cultural phenomenon‚ transcending gaming through a popular Saturday morning cartoon and a wave of controversies. The cartoon‚ airing in the 1980s‚ introduced the game to a broader audience‚ blending fantasy and adventure. Meanwhile‚ the game faced backlash‚ with critics linking it to Satanism and negative societal influences. This period of scrutiny paradoxically fueled its popularity‚ as media coverage kept D&D in the public eye. The game’s portrayal in mainstream media‚ both positive and negative‚ cemented its place in pop culture‚ making it a symbol of geek culture and creative storytelling. These events not only shaped its legacy but also laid the groundwork for its enduring influence on modern entertainment and gaming.

Legacy and Impact on Modern Gaming

The 1st Edition of Dungeons & Dragons left an indelible mark on modern gaming‚ shaping the foundation of tabletop RPGs. Its innovative mechanics‚ such as character creation and the d20-based combat system‚ became industry standards. The game’s emphasis on collaborative storytelling and open-ended creativity inspired countless RPGs and video games. Many modern systems‚ including D&D 5th Edition‚ draw directly from its core concepts. The 1st Edition also fostered a vibrant community‚ leading to the creation of iconic settings like Forgotten Realms and Greyhawk. Its influence extends beyond tabletop gaming‚ inspiring video games‚ literature‚ and pop culture. The release of 1st Edition PDFs has reintroduced this classic to new generations‚ ensuring its legacy endures. Today‚ it remains a testament to the power of imaginative gameplay and a cornerstone of gaming history.

honeywell 8000 installation manual pdf

Welcome to the Honeywell 8000 Installation Manual, your comprehensive guide for installing and configuring the VisionPro 8000 thermostat; This manual covers installation steps, advanced settings, safety precautions, and troubleshooting tips to ensure a smooth setup and optimal performance. Designed for both professionals and homeowners, it provides detailed instructions to unlock installer options, configure schedules, and enable Wi-Fi connectivity. Follow this guide to ensure your thermostat is installed correctly and functions efficiently.

System Requirements and Compatibility

The Honeywell 8000 thermostat is compatible with 1H/1C and 2H/1C HVAC systems, including heat pumps with auxiliary heat. Ensure electrical requirements are met, and safety precautions are followed during installation.

Overview of Compatible HVAC Systems

The Honeywell 8000 thermostat is compatible with a variety of HVAC systems, including 1H/1C and 2H/1C heat pumps, with or without auxiliary heat. It also supports conventional heating and cooling systems. The thermostat works seamlessly with dual-fuel systems, ensuring efficient operation. For heat pumps, it accommodates auxiliary/emergency heat relay configurations. The system is designed to integrate with standard HVAC equipment, making it a versatile solution for different home setups. Proper compatibility ensures reliable performance and energy efficiency, tailored to meet diverse heating and cooling needs.

Electrical Requirements and Safety Precautions

Before installing the Honeywell 8000 thermostat, ensure the system meets electrical requirements. Disconnect power to avoid electrical shock or damage. The thermostat requires a 24VAC common wire (C) and is compatible with most standard HVAC systems. Use appropriate wire gauges and connections to prevent overheating. Always follow local electrical codes and safety guidelines. Installation should only be performed by a trained technician. Proper grounding and wiring are essential to ensure safe and reliable operation. Failure to adhere to these precautions may result in system malfunctions or safety hazards.

Installation Steps

Begin by separating the wallplate from the thermostat. Drill holes for wall anchors, install them, and mount the wallplate. Connect the wires to the appropriate terminals, ensuring secure connections for reliable operation.

Preparing the Site and Tools Needed

Before starting, disconnect power to the HVAC system to avoid electrical hazards. Gather necessary tools, including a drill, 3/16-inch and 7/32-inch drill bits, wall anchors, and a screwdriver. Ensure the installation area is clean, flat, and free from obstructions. For drywall, drill 3/16-inch holes, and for plaster, use 7/32-inch holes. Insert wall anchors to secure the wallplate. Verify all wiring is labeled and organized. Ensure the thermostat and wallplate are separated before mounting. Follow safety guidelines to prevent damage or injury during the installation process.

Mounting the Thermostat and Wallplate

Begin by separating the thermostat from the wallplate. Remove any protective covering from the thermostat and wallplate. Locate the installation area, ensuring it is level and accessible. Mark the wall for drilling, using the wallplate as a template. Drill pilot holes for wall anchors, then insert the anchors securely. Mount the wallplate by screwing it into the anchors, ensuring it is level and firmly attached. Once the wallplate is installed, align the thermostat with the wallplate and gently press until it clicks into place. Ensure all connections are secure and the thermostat is properly seated.

Wiring the System and Connecting Terminals

Disconnect power from the HVAC system before starting. Use the wiring diagram provided to identify terminals (R, C, Y, G, etc.). Connect wires to the wallplate terminals, ensuring secure and correct connections. Match the wires from the HVAC system to the corresponding terminals on the thermostat. Tighten all connections firmly to avoid loose wires. Double-check the wiring diagram for accuracy and verify that all terminals are properly connected. Once wired, restore power and test the system to ensure proper operation. Proper wiring is critical for safe and efficient thermostat function.

Unlocking Installer Options

Access advanced settings by entering the Installer Setup Menu using the date code as the password. This allows configuration of system parameters for optimal performance.

Accessing the Installer Setup Menu

To access the Installer Setup Menu on the Honeywell VisionPro 8000 thermostat, start by touching the Menu option on the home screen. From there, scroll and select Dealer Information. At the bottom of this screen, you’ll find the Date Code, which serves as the password for unlocking installer options. Return to the main menu, select Installer Options, and enter the Date Code when prompted. This grants access to advanced configuration settings, enabling you to customize system parameters for optimal performance. Ensure you follow these steps carefully to avoid errors during setup.

Using the Date Code as a Password

The Date Code, located in the Dealer Information section, acts as the default password for accessing advanced installer settings. Once you’ve navigated to the Installer Options menu, enter the Date Code when prompted. This step is crucial for unlocking configuration options, allowing you to customize system parameters such as schedules, IAQ settings, and Wi-Fi connectivity. Ensure the Date Code is entered accurately to avoid access issues. This security feature protects settings from unintended changes, maintaining system integrity and performance.

Configuring Advanced Settings

Customize system parameters to optimize performance, including scheduling, IAQ options, and Wi-Fi connectivity. Ensure precise configuration to avoid errors and maintain efficient HVAC operation.

Setting Up Schedules and IAQ Options

Configure custom schedules and IAQ (Indoor Air Quality) options to enhance comfort and efficiency. Access the Installer Setup Menu using the Date Code as the password. Define temperature settings for different times of the day, ensuring optimal comfort. Adjust IAQ parameters to improve air circulation and filtration. Use the touchscreen interface to customize these settings, balancing energy savings with indoor air quality. Regularly review and update schedules to align with lifestyle changes or seasonal needs for maximum performance and energy efficiency.

  • Set daily schedules for heating and cooling.
  • Activate IAQ modes for improved air quality.
  • Customize settings to match your preferences.

Enabling Wi-Fi and Remote Access

To enable Wi-Fi and remote access on your Honeywell 8000 thermostat, navigate to the Installer Setup Menu. Use the Date Code as the password for access. Once logged in, select the Wi-Fi option and connect to your home network by entering the password. After successful connection, download the Honeywell Home app to control your thermostat remotely. This feature allows you to adjust settings, monitor energy usage, and receive notifications from anywhere, enhancing convenience and energy management. Ensure stable internet connectivity for seamless remote operation.

  • Connect to your home Wi-Fi network.
  • Download and install the Honeywell Home app.
  • Control your thermostat remotely via the app.

Troubleshooting Common Issues

Identify common issues like wiring problems or display errors. Check connections, ensure proper power supply, and restart the system if necessary. Refer to the manual for detailed solutions to resolve operational issues effectively.

Resolving Wiring and Connection Problems

To address wiring issues, first disconnect power to avoid electrical hazards. Check all connections for tightness and accuracy, ensuring terminals match the system requirements. Use a multimeter to verify wiring integrity and detect short circuits or open wires. Consult the wiring diagram in the manual to confirm proper connections. If issues persist, verify the equipment monitor and auxiliary heat settings. Reset the system after correcting wiring errors. If problems remain, refer to the troubleshooting section or contact a certified technician for assistance.

  • Ensure all wires are securely connected to the correct terminals.
  • Verify the wiring diagram matches your HVAC system configuration.
  • Use a multimeter to test for continuity or shorts in the wiring.
  • Check for loose connections or damaged wires that may cause malfunctions.

Addressing Display and Communication Errors

If the display is blank or unresponsive, ensure the thermostat has power and batteries are installed correctly. Reset the device by removing batteries or disconnecting power for 30 seconds. For communication errors, verify Wi-Fi connectivity and check the router’s signal strength. Ensure the thermostat is properly registered to your Honeywell Home account. If issues persist, perform a factory reset by holding the menu button for 10 seconds. Consult the manual for detailed troubleshooting steps or contact Honeywell support for further assistance.

  • Check power sources and battery connections.
  • Restart the thermostat to resolve temporary glitches.
  • Verify network settings and Wi-Fi signal strength.
  • Perform a factory reset if communication issues remain unresolved.

Maintenance and Updating the Thermostat

Regular maintenance ensures optimal performance of your Honeywell 8000 thermostat. Clean the display with a soft cloth to prevent dust interference. Replace batteries every 5 years or as indicated. For hardwired systems, ensure power is stable. Check for firmware updates via the menu or Honeywell Home app. Update promptly to access new features and security enhancements. Refer to the manual for detailed instructions on updating software and performing routine checks to maintain efficiency and functionality.

Regular Maintenance Tips

Regular maintenance ensures your Honeywell 8000 thermostat operates efficiently. Clean the display with a soft, dry cloth to remove dust and fingerprints. For battery-powered models, replace batteries every 5 years or when the low-battery indicator appears. In hardwired systems, ensure a stable power supply to prevent malfunctions. Check for firmware updates via the menu or Honeywell Home app and install them promptly to access new features and improvements. Refer to the manual for detailed instructions on updating software and performing routine checks to maintain optimal performance and reliability.

Updating Firmware and Software

To keep your Honeywell 8000 thermostat functioning at its best, regular firmware and software updates are essential. Check for updates via the Honeywell Home app or directly through the thermostat menu. Select “Update Firmware” and follow the on-screen instructions to download and install the latest version. The system may restart during the update process, which is normal. Ensure uninterrupted power during the update to avoid any issues. Updated firmware often includes new features, performance improvements, and bug fixes to enhance your thermostat’s functionality and compatibility.

Congratulations on completing the installation of your Honeywell 8000 thermostat! This manual has provided a comprehensive guide to ensure your system operates efficiently and safely. By following the steps, you’ve successfully configured settings, unlocked installer options, and prepared for future updates. Regular maintenance and timely firmware updates will keep your system running smoothly. Refer to this manual for troubleshooting or adjustments. Enjoy the enhanced comfort, energy savings, and advanced features your Honeywell 8000 thermostat offers. Happy heating and cooling!

kn filter chevy zr2 instructions

The KN filter for Chevy ZR2 is a high-performance air filter designed to enhance engine efficiency, horsepower, and torque. Its washable and reusable design ensures long-term savings and improved airflow, making it a popular upgrade for off-road enthusiasts. Proper installation is key to maximizing its benefits and maintaining optimal engine performance. This guide provides a comprehensive overview of the installation process, tools needed, and maintenance tips to ensure your KN filter operates at its best.

Overview of the KN Filter and Its Benefits for Chevy ZR2

The KN filter is a high-performance air filter designed to maximize airflow and engine efficiency for the Chevy ZR2. Its washable and reusable design eliminates the need for frequent replacements, offering long-term cost savings. By reducing air intake restrictions, it enhances horsepower, torque, and throttle response, making it ideal for both on-road driving and off-road adventures. The filter’s durable construction ensures it can withstand harsh conditions, including dusty terrains, while maintaining optimal performance. Unlike stock filters, the KN filter provides superior filtration without sacrificing airflow, making it a top choice for ZR2 owners seeking improved engine performance and reliability.

Importance of Proper Installation

Proper installation of the KN filter in your Chevy ZR2 is crucial for ensuring optimal performance and longevity. Incorrect installation can lead to issues such as reduced airflow, decreased engine efficiency, and potential damage to the engine. A proper seal ensures that the filter functions correctly, preventing contaminants from bypassing the filter and entering the engine. Additionally, following the manufacturer’s instructions guarantees that the filter is securely fitted, avoiding air leaks and maintaining the integrity of the air intake system. Proper installation also ensures that the filter’s reusable design functions as intended, providing long-term benefits and maintaining your vehicle’s warranty coverage. Attention to detail during installation is essential for maximizing the filter’s performance and protecting your engine.

Tools and Materials Needed

  • A screwdriver or T-20 star tool for removing airbox clamps.
  • Gloves and safety glasses for protection.
  • A soft brush or cloth for cleaning the airbox.
  • Sealing grease for ensuring a proper seal.
  • Hose clamps for securing the filter adapter.

Required Tools for Installation

To install the KN filter on your Chevy ZR2, you’ll need a T-20 star tool or screwdriver for removing airbox clamps. A socket set, including 3/8″ and 1/4″ sockets, is essential for securing components. Pliers and a torque wrench may also be necessary for tight spaces and ensuring proper torque specifications. Additional tools include a soft brush for cleaning debris and a small container for the sealing grease. Proper tools ensure a smooth, error-free installation process, preventing damage to the airbox or filter. Always refer to the manufacturer’s instructions for specific tool recommendations tailored to your vehicle’s make and model year.

Additional Materials for Proper Sealing

For a leak-free installation of the KN filter on your Chevy ZR2, ensure you have the supplied sealing grease and gaskets. The sealing grease is applied to the filter’s edges and airbox lid to prevent air leaks. Gaskets are pre-installed on the KN filter but should be inspected for integrity. Use a small brush to apply the grease evenly, focusing on areas where the filter and airbox meet. Proper sealing ensures optimal airflow and prevents dust ingestion. Follow the manufacturer’s guidelines for application to maintain warranty compliance and performance. Additional materials like torque wrenches may be needed for securing components tightly without over-tightening, ensuring a precise seal and long-term reliability.

Step-by-Step Installation Instructions

Begin by removing the stock air filter and inspecting the airbox for debris. Install the KN filter, ensuring a snug fit, and secure the airbox lid tightly. Apply the provided sealing grease to prevent leaks and verify proper alignment before finalizing the installation. Follow the manufacturer’s guidelines for a seamless process. This step-by-step approach ensures optimal performance and longevity of your KN filter.

Removing the Stock Air Filter

Start by opening the hood of your Chevy ZR2 and locating the airbox. Use a screwdriver or socket wrench to remove the bolts or clamps securing the airbox lid. Carefully lift the lid to access the stock air filter. Gently pull out the filter, taking note of its orientation and position in the housing. If any debris remains, use a soft brush or cloth to clean the airbox before proceeding. Ensure no dust or dirt is left behind, as this could affect the performance of the new KN filter. Once the stock filter is removed, inspect the area to confirm it’s clean and ready for the new filter installation.

Inspecting and Preparing the Airbox Housing

After removing the stock air filter, thoroughly inspect the airbox housing for any debris, dust, or dirt. Use a soft-bristle brush or a clean cloth to wipe down the interior surfaces, ensuring no contaminants remain. Check the gasket areas for signs of wear or damage, as a proper seal is crucial for optimal performance. If the housing is dirty or corroded, clean it with a mild detergent and dry it completely before proceeding. Apply a small amount of the provided sealing grease to the airbox lid and housing mating surfaces to ensure a tight, leak-free seal. This step is essential for maintaining proper airflow and preventing potential performance issues.

Installing the KN Filter

Place the KN filter into the airbox base, aligning it with the gasket to ensure proper seating. Gently press around the edges of the filter to secure it firmly in position. Make sure the filter is evenly aligned and the gasket is fully engaged with the airbox housing. Apply a bead of the provided sealing grease to the sides of the filter and the mating surfaces of the airbox lid to ensure a leak-free seal. This step is critical for maintaining proper airflow and preventing any potential performance issues. Once installed, double-check the filter’s alignment and fit before proceeding to secure the airbox lid.

Securing the Airbox Lid

Once the KN filter is properly installed, place the airbox lid back onto the housing, ensuring it aligns perfectly with the base. Apply a thin, consistent bead of the provided sealing grease along the lid’s edges and the airbox housing where they meet. This ensures a leak-free seal and optimal performance. Tighten the airbox screws in a star pattern to avoid warping the lid. Do not overtighten, as this could damage the gasket or housing. Finally, inspect the seal for any gaps or irregularities. Properly securing the airbox lid is essential for maintaining the KN filter’s efficiency and preventing any potential performance issues.

Post-Installation Checks

Inspect the filter’s seal, ensure no air leaks, and verify proper alignment. Check that the airbox lid is tightly secured without overtightening. Confirm everything fits seamlessly.

Ensuring Proper Fit and Seal

After installing the KN filter, inspect the airbox housing for any gaps or misalignment. Ensure the filter is seated snugly and the gasket is evenly pressed around the edges. Check that the airbox lid closes securely without any visible leaks; Apply the provided sealing grease to the filter’s sides and the airbox lid’s mating surfaces for an airtight seal. Verify all clamps and screws are tightened firmly but avoid overtightening, which could damage the housing. A proper fit and seal are crucial for maintaining optimal airflow and preventing engine performance issues. Double-checking these steps ensures the KN filter functions as intended.

Verifying Filter Alignment

After securing the airbox lid, visually inspect the KN filter’s alignment within the housing. Ensure the filter is evenly positioned and not tilted, as misalignment can restrict airflow. Check that the gasket is fully seated and flush with the airbox edges. Verify that the filter adapter is securely connected to the intake tube, ensuring proper alignment. Gently rock the filter back and forth to confirm stability and even contact with the housing. If the filter shifts or feels loose, adjust its position and resecure the lid. Proper alignment ensures unrestricted airflow and optimal engine performance, making this step critical for maximizing the KN filter’s efficiency.

Maintenance and Cleaning Tips

Regularly clean and recharge the KN filter using a Kamp;N filter cleaner and oil kit. Wash the filter with soap and water, rinse thoroughly, and let it dry before reapplying oil. This ensures optimal performance and longevity, maintaining your Chevy ZR2’s enhanced airflow and engine efficiency.

Cleaning the KN Filter

Cleaning the KN filter for your Chevy ZR2 is essential for maintaining its performance. Start by spraying the filter with a KN-specific cleaner, ensuring complete coverage. Allow it to sit for 10 minutes to loosen dirt. Next, rinse the filter thoroughly with water from the clean side to the dirty side to remove debris. Gently shake off excess water, then let it air dry completely to prevent damage. Once dry, reapply the KN filter oil evenly, following the product instructions for the correct amount. Regular cleaning every 50,000 miles or as needed ensures optimal airflow and engine efficiency. Avoid using compressed air, as it may damage the filter fibers. Proper care will extend the life of your KN filter, ensuring your Chevy ZR2 continues to perform at its best.

Reapplying Filter Oil

After cleaning the KN filter, reapplying filter oil is crucial for maintaining its performance and filtering efficiency. Use only KN-specific filter oil to ensure proper functionality. Start by shaking the oil bottle well and evenly spraying the oil onto the filter from the inside out. Avoid over-saturating, as excess oil can attract dust and reduce airflow. Allow the oil to absorb fully before reinstalling the filter. Proper oil application ensures the filter traps contaminants effectively and maintains engine protection. Reapply oil every 50,000 miles or as needed, following the manufacturer’s instructions for the best results. This step ensures your KN filter continues to deliver optimal performance for your Chevy ZR2.

Troubleshooting Common Issues

Common issues with KN filter installations include reduced performance, air leaks, or improper fit. Ensure all connections are secure and follow installation steps carefully to resolve these problems effectively.

Addressing Reduced Performance

If your Chevy ZR2 experiences reduced performance after installing the KN filter, inspect the filter for proper installation and alignment. Ensure the filter is securely seated within the airbox and that all connections are tight. Check for any signs of air leaks around the edges or gaskets, as these can disrupt airflow. Reapplying the appropriate sealing grease may be necessary to create a proper seal. Additionally, verify that the filter is free from debris or blockages. If issues persist, consider cleaning or re-oiling the filter according to manufacturer instructions to restore optimal performance and ensure your engine runs smoothly.

Fixing Air Leaks

To address air leaks during KN filter installation on your Chevy ZR2, start by inspecting the filter’s edges and gaskets for proper alignment and sealing. Ensure the filter is seated snugly within the airbox and that the gasket is free from damage or misalignment. Apply the provided sealing grease to the filter’s edges and the airbox lid, following the manufacturer’s instructions. Check the airbox lid alignment and tighten the screws evenly to prevent gaps. Inspect the gasket surfaces for cleanliness and integrity, replacing any damaged components if necessary. Properly sealing the system ensures optimal airflow and performance, preventing any loss of power or efficiency caused by air leaks.

Installing a KN filter on your Chevy ZR2 enhances performance and efficiency. Follow the instructions carefully for a proper fit, ensuring optimal airflow and engine power. Long-term benefits include improved horsepower, torque, and fuel efficiency, making it a worthwhile upgrade for both on-road and off-road driving experiences.

Final Thoughts on KN Filter Installation

Installing a KN filter on your Chevy ZR2 is a straightforward process that enhances performance and efficiency. The filter’s washable and reusable design ensures long-term savings and improved airflow. Proper installation is crucial to maximize benefits, such as increased horsepower, torque, and better fuel efficiency. With basic tools and careful steps, the KN filter fits seamlessly into the factory airbox. Its durable construction ensures reliable performance in various driving conditions. By following the instructions closely, you can enjoy the full potential of your vehicle. This upgrade is a practical solution for off-road enthusiasts seeking improved engine power and longevity. Proper maintenance will ensure the filter continues to deliver exceptional results over time.

Long-Term Benefits of Using a KN Filter

Using a KN filter in your Chevy ZR2 offers numerous long-term benefits, including improved engine performance and fuel efficiency. The filter’s washable and reusable design eliminates the need for frequent replacements, saving money over time. Its high-flow technology ensures consistent airflow, which can lead to increased horsepower and torque. The filter’s durability, lasting up to 1 million miles with proper maintenance, reduces waste and minimizes the environmental impact of disposable filters. By enhancing engine efficiency, the KN filter also contributes to better overall vehicle performance, making it a practical and sustainable upgrade for both on-road and off-road driving conditions. Regular cleaning and re-oiling ensure optimal functionality, providing years of reliable service.

killing an elephant pdf

The phrase “killing an elephant” evokes a powerful image, conjuring visions of immense size, ethical dilemmas, and colonial history. George Orwell’s essay explores themes of imperialism, moral conflict, and societal expectations, offering a profound critique of power dynamics.

Overview of the Topic

George Orwell’s essay “Shooting an Elephant” delves into the complexities of imperialism and personal morality. Set during British colonial rule in Burma, the narrative explores the author’s experience as a police officer forced to kill an elephant that has gone rogue. The essay examines the tension between societal expectations and individual conscience, highlighting how colonial authority often leads to moral compromise. The elephant serves as a symbol of oppression and the destructive nature of unchecked power, resonating with themes of imperialism and ethical conflict.

Relevance of the Phrase “Killing an Elephant”

The phrase “killing an elephant” carries profound symbolic weight, representing both the destruction of a majestic creature and the moral dilemmas inherent in colonial authority. Orwell’s essay underscores the ethical implications of such an act, where societal pressure and the need to maintain power often overshadow personal beliefs. The phrase has become a metaphor for confronting tough decisions, questioning authority, and understanding the consequences of actions driven by expectations rather than conscience, making it universally relevant in discussions on power dynamics and individual morality.

Historical Context

Set in colonial Burma, the essay reflects British imperialism’s impact, where Orwell served as a police officer. The elephant’s death symbolizes colonial power struggles and economic exploitation.

Colonial Background in Burma

Burma, under British colonial rule, faced widespread resentment toward foreign authority. Orwell’s experience in Moulmein highlighted the tensions between colonizers and locals. The British Empire’s exploitation of Burma’s resources fueled economic disparities, creating a volatile environment. Orwell, as a police officer, was caught between enforcing imperial order and understanding local perspectives. This backdrop of oppression and resistance shaped the events leading to the elephant’s death, symbolizing the broader struggle against colonial domination and its moral ambiguities.

George Orwell’s Experience as a Police Officer

Orwell served as a British police officer in Burma, witnessing firsthand the tensions of colonial rule. His role placed him in a position of authority, yet he felt isolated and resented by locals. The pressure to maintain order often conflicted with his personal beliefs, creating internal strife. His experiences during this time deeply influenced his writing, particularly in “Shooting an Elephant,” where he grapples with the moral implications of his actions under colonial pressure.

Orwell’s essay recounts his experience as a police officer in Burma, where he shot an elephant to maintain colonial authority, highlighting the internal conflict and moral complexity.

Key Events in “Shooting an Elephant”

The essay begins with Orwell, as a sub-inspector, receiving reports of a rogue elephant causing destruction. He fetches a rifle and follows the elephant, observing its calm demeanor. Despite feeling it would be wrong to kill the elephant, Orwell ultimately shoots it to maintain his authority. The elephant’s prolonged death leaves Orwell reflecting on the senselessness of colonialism and the pressure to conform to societal expectations, highlighting the moral ambiguity of his actions.

Orwell’s Moral and Ethical Dilemma

Orwell grapples with a profound moral conflict, believing it would be “murder” to kill the calm elephant. Despite his hesitation, societal pressure compels him to act, fearing ridicule and loss of authority. The dilemma reflects his internal clash between personal beliefs and external expectations, ultimately leading to a tragic decision. This moment encapsulates the broader critique of colonialism and the human tendency to conform, even when it conflicts with moral judgment.

Themes and Symbolism

Orwell uses the elephant to symbolize colonial oppression, exploring themes of power, imperialism, and the moral decay of imperial rule.

Imperialism and Its Impact

Orwell’s essay vividly illustrates the oppressive nature of imperialism, depicting British colonial rule in Burma as a system of exploitation and cultural destruction. The elephant, a majestic creature, symbolizes the indigenous population’s suffering under imperial control. Orwell’s role as a police officer highlights the moral corruption inherent in enforcing oppressive systems. The destruction of the elephant mirrors the devastating impact of colonialism on local traditions and ecosystems, revealing the hypocrisy of imperial powers claiming to bring civilization while perpetuating violence and control;

The Elephant as a Symbol of Power and Oppression

The elephant in Orwell’s essay serves as a potent symbol of power and oppression, embodying both the strength of colonial rule and the resistance of the oppressed. Its majestic presence represents the untamed spirit of Burma, while its destruction signifies the brutal force of imperialism. Orwell’s decision to kill the elephant, driven by public expectation, underscores the theme of power dynamics, where authority figures must maintain control, even through destructive means, to uphold their dominance and societal expectations.

Ethical Considerations

The act raises a moral conflict between public expectation and personal ethics. Killing the elephant, valued alive at £100 but worth only £5 dead, highlights the ethical disparity between economic gain and animal welfare, reflecting broader ethical questions about colonialism and power.

Moral Implications of Killing the Elephant

Killing the elephant sparks a deep moral conflict, as Orwell grapples with personal beliefs versus societal expectations. The act, though legally justified, feels like murder to him, highlighting the ethical tension between duty and compassion. The elephant’s value alive far exceeds its worth dead, symbolizing the destruction of something irreplaceable. This dilemma reflects broader ethical questions about power, colonialism, and the consequences of conforming to societal pressures over personal morality.

Public Perception vs. Personal Beliefs

Orwell’s decision to kill the elephant is driven by public expectation rather than personal conviction. Despite feeling it would be “murder,” he succumbs to the pressure of the crowd, fearing ridicule and loss of authority. This highlights the clash between societal demands and individual morality. The incident underscores how external perceptions often override internal beliefs, leading to actions that align with what others expect rather than what one truly believes is right.

Legal and Practical Aspects

Legally, killing a mad elephant was justified as a necessity to protect public safety. Practically, inaction could lead to destruction and harm, making it Orwell’s duty to act.

Legal Justification for Killing the Elephant

Legally, Orwell was obligated to act as a colonial officer, with the duty to maintain order and protect the public. The elephant, deemed a threat, had to be controlled. Under British colonial law, a mad elephant posed a danger, and its owner failed to restrain it, making lethal action legally justifiable. Orwell, though morally conflicted, followed the law to prevent further destruction and harm, fulfilling his official responsibilities despite personal ethical reservations about the act.

Consequences of Inaction

If Orwell had not killed the elephant, the consequences would have been severe. The elephant’s rampage would continue, causing destruction and endangering lives. Inaction would undermine Orwell’s authority as a colonial officer, as the local population expected decisive action. Additionally, failing to act could lead to legal repercussions, as he was duty-bound to protect the community. The pressure to conform to expectations and maintain imperial control left Orwell with no choice but to act, despite his personal reluctance and moral doubts about the necessity of killing the elephant.

Modern Relevance

Orwell’s essay remains relevant today, sparking discussions on animal rights and ethical decision-making. It highlights the enduring impact of colonialism and the consequences of unchecked power.

Contemporary Discussions on Animal Rights

Modern debates on animal rights often reference Orwell’s essay, highlighting ethical concerns about killing animals. The narrative underscores the moral complexities of such actions, resonating with today’s advocacy for animal welfare and conservation. It challenges societal norms and encourages reflection on the ethical treatment of animals, aligning with contemporary movements that prioritize compassion and sustainability. Orwell’s work remains a powerful metaphor for the ongoing struggle between human interests and animal rights.

Lessons from Colonial History

Orwell’s essay offers a stark critique of imperialism, revealing its moral corruption and hypocrisy. The killing of the elephant symbolizes the destruction of freedom and autonomy under colonial rule. It highlights how colonial powers often justified their actions through fear and control, rather than justice. The narrative serves as a cautionary tale about the dangers of unchecked power and the ethical failures of colonialism, urging readers to reflect on history’s lessons and their relevance today.

Orwell’s essay underscores the destructive nature of imperialism and the loss of moral autonomy under oppressive systems. The killing of the elephant remains a potent symbol of colonialism’s ethical failings, urging readers to reflect on power, morality, and individual responsibility.

Final Thoughts on the Essay’s Message

Orwell’s essay delivers a poignant critique of imperialism, revealing its dehumanizing effects on both the oppressor and the oppressed. The killing of the elephant symbolizes the destruction of innocence and the moral decay perpetuated by colonial rule. Orwell’s narrative highlights the tension between personal conscience and societal expectations, underscoring the loss of autonomy under oppressive systems. The essay serves as a timeless reflection on power, morality, and the consequences of blindly following authority, urging readers to question systemic injustices and uphold ethical principles in the face of societal pressure.

double flush detox instructions

Detoxification is the natural process of eliminating toxins from the body, enhancing overall health and well-being. It involves cleansing systems to support metabolism, digestion, and nutrient absorption, aiding in mental and physical renewal.

Understanding Double Flush Detox

Double Flush Detox is a method to cleanse the body of toxins, often used for drug test preparation. It involves a combination of supplements, hydration, and dietary changes to naturally flush out impurities.

Definition and Purpose

The Double Flush Detox method is designed to eliminate toxins from the body through a two-phase cleansing process. Its primary purpose is to assist individuals in passing drug tests by rapidly flushing out substances like THC, ensuring a clean urine sample. This method gained popularity due to its effectiveness when followed correctly, emphasizing the importance of hydration and specific supplement intake. The process typically involves taking detox tablets followed by a detox drink, which helps in masking toxins temporarily. Users are advised to avoid certain foods and substances during the detox period to maximize its effectiveness. The method is particularly favored for its ability to provide quick results, often within a few hours, making it a reliable option for those needing to detox in a short timeframe. Proper adherence to instructions is crucial to achieve desired outcomes and ensure the detox process works as intended.

Key Components of the Double Flush Method

The Double Flush Detox method relies on specific components to ensure effectiveness. The primary elements include detox tablets and a detox drink, designed to flush out toxins and mask their presence in the body. The tablets are taken in a specific dosage and frequency, typically every hour for a set number of hours, followed by the detox drink consumed after the last tablet. Hydration plays a crucial role, with recommendations to drink ample water before, during, and after the process to help flush out the system. Additionally, the method emphasizes the importance of avoiding certain foods and substances, such as meat and refined sugars, to optimize detox efficiency. Finally, users are advised to refrain from smoking or consuming drugs for at least 72 hours before starting the detox to ensure the best results. These components work synergistically to support the body’s natural cleansing process and help achieve the desired outcomes.

Step-by-Step Instructions for Double Flush Detox

Begin with the preparation phase, avoiding prohibited substances. Take tablets hourly for 5 hours, followed by the detox drink 2 hours later. Stay hydrated and abstain from harmful foods to enhance effectiveness.

Preparation Phase: What to Avoid

During the preparation phase of the double flush detox, it is crucial to avoid substances that may interfere with the process. Refrain from smoking or consuming any drugs for at least 72 hours prior to starting the detox. Additionally, eliminate meat, refined sugars, and processed foods from your diet to reduce toxin intake. Avoid alcohol and caffeine, as they can dehydrate the body and hinder detox efficiency. Stay hydrated by drinking plenty of water, but avoid eating heavy meals or fatty foods that slow digestion. It is also important to avoid any medications or supplements unless medically necessary. Finally, ensure you are mentally prepared for the cleanse and follow the instructions strictly to achieve optimal results. Proper preparation is key to ensuring the detox process is effective and safe.

Day 1-2: Initial Detox Process

Begin the double flush detox by starting with the anti-V root tonic, which helps kickstart your body’s natural detoxification systems. Take three tablets every hour for five consecutive hours, ensuring each dose is accompanied by 8 ounces of water. This step is essential to flush out toxins effectively. After completing the tablets, wait two hours before consuming the detox drink. This drink should be followed by 16 ounces of water, and another 16 ounces after 15 minutes. During these initial days, focus on hydration and avoid consuming solid foods to allow your body to concentrate on cleansing. Light exercise, such as walking, can also support the process by stimulating blood flow and aiding in toxin elimination. Stick to the regimen strictly to maximize the detox’s effectiveness and prepare your body for the intensive cleansing phase ahead.

Day 3-5: Intensive Cleansing

During Days 3-5, the focus shifts to intensive cleansing to deeply purify your system. Continue with the detox drink, ensuring you drink 16 ounces of water immediately after and another 16 ounces 15 minutes later. This step helps flush out toxins more aggressively. Maintain a strict regimen of hydration, aiming to drink at least 8-10 glasses of water daily. Avoid consuming solid foods to allow your body to focus entirely on detoxification. Light exercise, such as yoga or brisk walking, can enhance blood circulation and support the elimination process. Be prepared for increased urination as your body expels toxins. Stick to the diet restrictions, avoiding meat, refined sugars, and processed foods. Monitor your progress and adjust your hydration levels if needed. By the end of Day 5, your system should feel cleansed, and you’ll be ready to complete the final flush phase.

Final Flush: Completing the Detox

The final flush is the culmination of the double flush detox process, designed to eliminate any remaining toxins from your system. On the last day, take the detox drink 2 hours after your last set of tablets. Immediately after consuming the drink, drink 16 ounces of water. Wait 15 minutes, then drink another 16 ounces of water to ensure the detox drink is fully effective. Avoid eating solid foods for at least 4 hours before and after completing the flush to maximize results. Rest and hydration are key during this phase. After completing the flush, you can gradually reintroduce light, healthy meals to reset your digestive system. This step marks the end of the detox process, leaving your body cleansed and refreshed. Proper hydration and rest will help your body recover and reset for optimal health.

Diet and Lifestyle Recommendations

During the detox, eliminate meat, refined sugars, and processed foods. Stay hydrated with water and herbal teas. Consider using detox supplements or teas to aid cleansing. Rest adequately and gradually reintroduce healthy meals to support your body’s recovery.

Foods to Eliminate During Detox

To maximize the effectiveness of the double flush detox, certain foods must be avoided to prevent reintroducing toxins and hindering the cleansing process. Red meat, poultry, fish, and other flesh foods should be eliminated, as they can slow digestion and increase toxin buildup. Refined sugars, including white and brown sugar, should also be avoided, as they can disrupt natural detoxification pathways and lead to energy fluctuations. Processed foods, high-sodium snacks, and fried items are detrimental, as they contain harmful additives and fats that burden the liver and kidneys. Additionally, alcohol, caffeine, and sugary beverages should be avoided, as they can dehydrate the body and interfere with the detox process. By removing these foods, the body can focus on flushing out stored toxins more efficiently, promoting a cleaner and healthier system.

Hydration and Supplement Guidelines

Proper hydration is critical during the double flush detox to ensure toxins are effectively flushed out of the system. Aim to drink at least 8-10 glasses of water daily, with an additional 16 ounces of water after consuming the detox drink. Herbal teas and fresh vegetable juices can also contribute to hydration. Supplements play a key role in supporting the body’s natural detoxification processes. Consider adding vitamin C-rich supplements to enhance liver function and promote urination. Herbal remedies like dandelion root and milk thistle are known to support liver health and improve toxin elimination. Additionally, include fiber-rich supplements to aid digestion and prevent toxin reabsorption. Follow the recommended dosage on the product labels and consult a healthcare professional if unsure. Avoid excessive caffeine or sugary drinks, as they can dehydrate the body and counteract the detox efforts. Staying hydrated and supplementing wisely will help maintain the effectiveness of the double flush detox process.

celebrate recovery small group guidelines pdf

Celebrate Recovery Small Group Guidelines provide a safe, structured environment for sharing. They ensure confidentiality, respect, and focus, helping participants grow in their recovery journey.

Overview of the Importance of Small Group Guidelines

Small group guidelines are essential for creating a safe and structured environment in Celebrate Recovery. They ensure confidentiality, respect, and focus, helping participants feel secure and valued. These guidelines foster accountability, encourage open sharing, and promote spiritual growth. By establishing clear boundaries, they protect the integrity of the group and allow members to work through their hurts, habits, and hang-ups effectively. Adherence to these guidelines ensures a supportive and Christ-centered atmosphere, making the recovery process more impactful and meaningful for all involved.

Key Principles of Celebrate Recovery

Celebrate Recovery is rooted in Christ-centered principles, emphasizing spiritual growth and healing. The program focuses on anonymity and confidentiality, ensuring a safe space for sharing. It encourages participants to take responsibility for their actions and progress, fostering accountability. The guidelines promote active listening and discourage cross-talk, allowing each person to share without interruption. These principles create a supportive environment where individuals can address their hurts, habits, and hang-ups, finding freedom through faith and community. This foundation is vital for meaningful and lasting recovery.

Keep Your Sharing Focused on Your Own Thoughts and Feelings

Focus on your personal experiences and emotions, avoiding advice or discussing others. Use “I” statements to share openly and honestly within the group setting.

Why Focusing on Personal Experiences Is Crucial

Focusing on personal experiences ensures authenticity and vulnerability, creating a safe space for healing. It prevents advice-giving and redirects attention to individual growth, fostering accountability and self-reflection. By sharing openly, participants avoid projecting their struggles onto others, allowing for genuine connection and trust within the group. This approach honors the Christ-centered foundation of Celebrate Recovery, promoting a supportive and non-judgmental environment where individuals can freely express their thoughts and emotions, facilitating deeper spiritual and emotional transformation.

How to Share Effectively in a Small Group Setting

To share effectively, focus on your own thoughts and feelings using “I” statements. Keep your sharing concise, within the suggested time limit, to allow others to participate. Avoid giving advice or engaging in cross-talk, as this distracts from the speaker’s experience. Practice active listening by maintaining eye contact and showing empathy. Refrain from interrupting or judging, ensuring a safe and respectful environment. This approach fosters deeper connection and encourages honest sharing, aligning with the Christ-centered values of Celebrate Recovery and promoting meaningful spiritual growth for all participants.

No Cross-Talk Allowed During Sharing

Cross-talk, or dialogue between members during sharing, is prohibited to ensure each person can express feelings without interruption. This rule maintains focus and respect for the speaker.

Understanding the Concept of Cross-Talk

Cross-talk refers to conversations between participants during sharing, which can disrupt the focused environment. It prevents individuals from fully expressing their thoughts without interruption, potentially hindering personal growth and group cohesion. By eliminating cross-talk, the group ensures each member’s experience is respected and valued, fostering a safe space for vulnerability and recovery. This guideline is essential for maintaining the integrity and effectiveness of the sharing process in Celebrate Recovery small groups.

Benefits of Avoiding Cross-Talk in Recovery Groups

Avoiding cross-talk creates a safe, respectful environment where individuals can openly share without fear of interruption or judgment. This fosters deeper emotional engagement and accountability, allowing participants to focus on their personal growth. Without cross-talk, each person’s sharing becomes more impactful, promoting meaningful connections and spiritual healing. It also prevents sidebar conversations from distracting the group, ensuring everyone’s experience is valued and respected, which is crucial for the recovery journey in Celebrate Recovery small groups.

Confidentiality and Anonymity in Small Groups

Confidentiality ensures what is shared remains private, fostering trust. Anonymity protects identities, creating a safe space for vulnerable sharing. Exceptions exist for safety concerns, ensuring protection for all.

What Is Shared in the Group Stays in the Group

Confidentiality is a cornerstone of Celebrate Recovery small groups. What is shared within the group remains strictly private, fostering trust and vulnerability. This principle ensures that participants feel safe to open up about their struggles without fear of judgment or exposure outside the group. Exceptions are made only when there is an immediate risk of harm to oneself or others, requiring leaders to take appropriate action. This commitment to confidentiality creates a sacred space for healing and growth, aligning with the program’s Christ-centered values.

Exceptions to Confidentiality

While confidentiality is a key principle, there are rare exceptions. If a participant threatens to harm themselves or others, the small group leader must report this to the Celebrate Recovery Ministry Leader. This step ensures the safety and well-being of all involved. Such exceptions are made with careful consideration and only when there is an immediate risk. This balance between confidentiality and responsibility protects both the individual and the group, aligning with the program’s commitment to safety and Christ-centered care.

Avoid Offensive Language

Avoid offensive language to maintain a respectful and Christ-centered environment. This fosters a safe space for recovery and fosters meaningful connections among participants.

Creating a Christ-Centered Environment

Avoiding offensive language is essential to creating a Christ-centered environment. This ensures respect and dignity, fostering trust and openness. By maintaining a holy space, participants can focus on their spiritual and emotional healing. Offensive language can hinder vulnerability and connection, so keeping conversations clean and honorable aligns with Celebrate Recovery’s core values. This guideline supports the group’s mission to provide a safe, supportive, and God-honoring atmosphere for recovery and growth.

Impact of Offensive Language on Recovery

Offensive language can create a toxic environment, hindering trust and vulnerability. It distracts from the group’s spiritual focus and may cause emotional discomfort, making it harder for individuals to open up. Such language can also undermine the safe space essential for healing. By avoiding offensive words, participants foster respect and support, allowing the Holy Spirit to work freely in their lives. This guideline ensures that Celebrate Recovery remains a place of encouragement and transformation for all attendees.

Limit Your Sharing Time

Limit your sharing to three to five minutes to ensure everyone has an opportunity to participate. This guideline promotes fairness and respect, allowing the group to support each member effectively.

Time Limits for Sharing

Sharing time is typically limited to three to five minutes per person. This ensures each participant has an equal opportunity to contribute, fostering a balanced and supportive environment. Leaders may gently remind members to wrap up if they exceed the time, allowing others to share their thoughts and feelings. This guideline helps maintain focus and prevents domination by any single individual, ensuring the group remains a safe space for all to express themselves.

Respecting the Time of Others in the Group

Respecting time ensures everyone has the opportunity to share, fostering a sense of equality and fairness. By adhering to time limits, members demonstrate consideration for others, creating a safe and supportive environment. This guideline prevents domination by a few individuals, allowing deeper connections and mutual support to grow. It also helps maintain focus, ensuring the group remains productive and respectful of everyone’s contributions. Respecting time is essential for building a Christ-centered environment where healing and growth can thrive.

Additional Guidelines for Online Small Groups

Online groups face unique challenges, such as maintaining confidentiality and managing technology. Guidelines ensure a safe, structured environment for sharing, respecting privacy and fostering accountability in virtual settings.

Unique Challenges of Online Recovery Groups

Online recovery groups face distinct challenges, including maintaining confidentiality, ensuring privacy, and managing technical issues. Participants may struggle with feelings of isolation or difficulty in engaging deeply. Additionally, the lack of non-verbal cues can hinder emotional connection. Leaders must be vigilant in enforcing guidelines to create a safe space for sharing. These challenges require adaptability and creativity to foster meaningful interactions and support in a virtual setting.

Technological Considerations

Ensuring stable internet connectivity and privacy is crucial for online groups. Participants should use secure platforms and avoid distractions. Leaders must be tech-savvy to manage settings like screen sharing and chat features. Regular testing of audio and video ensures smooth sessions. Backup plans, such as alternative platforms, are essential for unexpected technical issues. These steps help maintain a focused and safe environment for recovery and sharing.

Role of the Small Group Leader

The leader facilitates and guides the group, ensuring guidelines are followed. They provide support, maintain confidentiality, and report serious concerns to ministry leaders, fostering a safe environment.

Responsibilities of the Leader

The leader’s responsibilities include creating a safe space, guiding discussions, and enforcing guidelines. They ensure sharing stays focused, prevent cross-talk, and maintain confidentiality. Leaders also provide support, encourage participation, and handle concerns appropriately. They are trained to guide the group effectively, fostering an environment of trust and accountability. Their role is crucial for the group’s success and spiritual growth, ensuring everyone feels supported and valued in their recovery journey. Effective leadership helps participants stay on track and find healing through shared experiences.

Ensuring Guidelines Are Followed

Leaders are responsible for ensuring all guidelines are followed during meetings. This includes monitoring adherence to time limits, preventing cross-talk, and maintaining confidentiality. Leaders gently correct behaviors that violate guidelines, such as offensive language or advice-giving. They also ensure sharing remains focused on personal thoughts and feelings. If confidentiality exceptions arise, leaders handle them appropriately. By consistently enforcing these rules, leaders create a safe, structured environment where participants can heal and grow. This fosters trust and accountability within the group, promoting spiritual and emotional recovery. Leaders lead by example, demonstrating respect and adherence to the guidelines.

1 3 4 5 6 7 45